TP-Link Archer AX55: Specs, Features, Pros & Cons
Its ports date it, and knowing that up front makes the rest of the router easy to judge. One gigabit WAN and four gigabit LAN mean the Archer AX55 cannot pass more than about a gigabit to the internet no matter what the wireless side is doing, which is irrelevant on most broadband plans and disqualifying on a fast one.
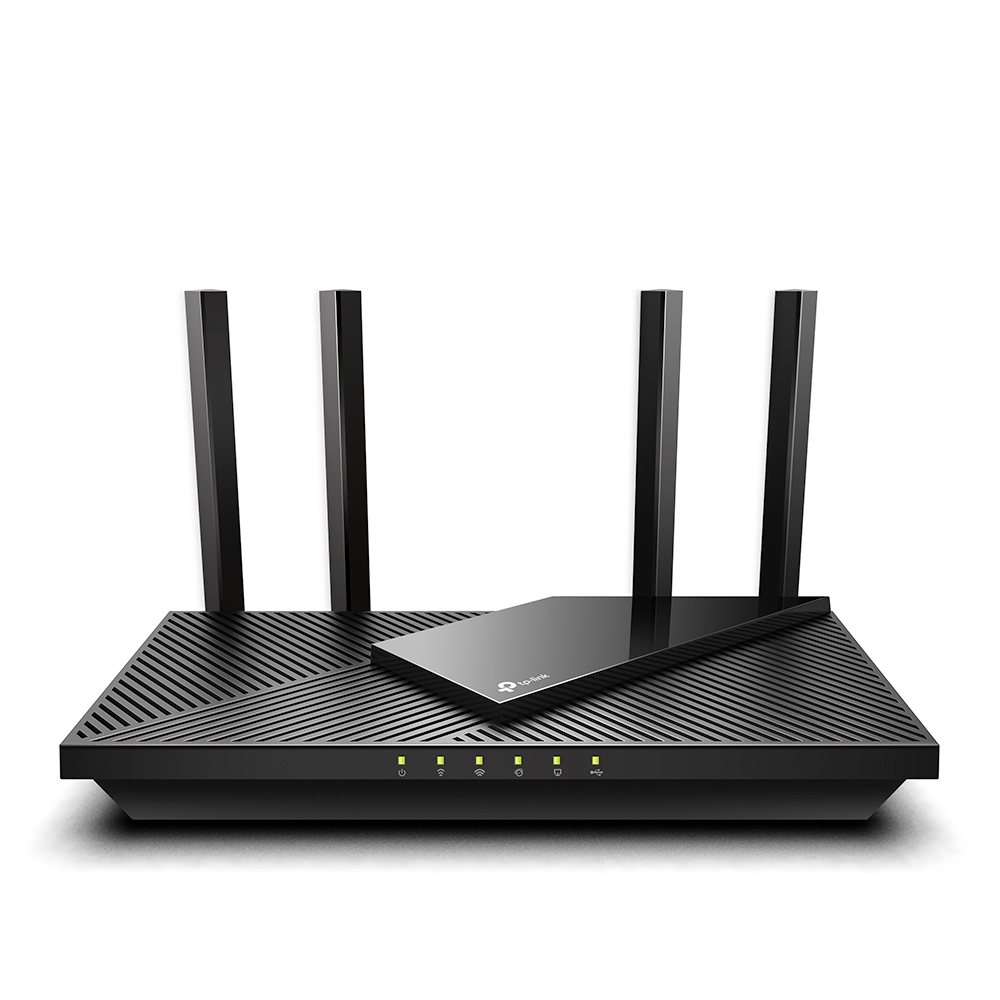
Inside that boundary it is unusually well provisioned for something this cheap. Half a gigabyte of RAM is more than a budget router normally carries, and memory is what determines whether a network stays composed with thirty or forty devices attached rather than becoming erratic. The wireless is dual-band Wi-Fi 6 across four external antennas, using the wider 160 MHz channels on 5 GHz, with beamforming and OFDMA for handling many clients at once.
The feature list also runs longer than the price implies. There is WPA3, a VPN server rather than a client only, traffic prioritization by device, parental controls with content filtering, a USB 3.0 port that will share a drive or act as a backup target, and mesh support in two competing flavors so a compatible extender can be added later without replacing the router.
There is no 6 GHz band, because this is Wi-Fi 6 rather than the later standard, and no multi-gig port anywhere.
Whether that matters is a question about the line coming into the building, not about the router. On a connection of a gigabit or below it will not be the bottleneck, and stepping up to a Wi-Fi 7 unit changes nothing you would notice. Above a gigabit, it becomes the bottleneck immediately, and no other specification on the sheet compensates.
Category strengths
Where the TP-Link Archer AX55 trails the median
- A much lower max wireless speed ?2,976 Mbps vs 7,876 Mbps (median)
- No 6 GHz band ?
- A much lower WAN port speed ?1 Gbps vs 2.5 Gbps (median)
- No multi-gig LAN ?
- No built-in security suite ?
- Much less RAM ?512 MB vs 1,024 MB (median)
- Fewer frequency bands ?2 vs 3 (median)
- Fewer processor cores ?2 vs 4 (median)
How this VS Score was computed
Score 19: each known spec is measured against the median of all wi-fi routers (26 products), then weighted; 50 means level with that median. In classes of six or more, a value beyond the class’s 10th–90th percentile range counts as that limit, so one extreme product cannot set the scale. 57% of the scoreable weight could be used; unknown values, features not applicable to this class and proxies (battery capacity where a rated life exists) add or remove nothing.
| Specification | This product | Cohort median | Score weight | Points moved |
|---|---|---|---|---|
| Wi-Fi standard | Wi-Fi 6 | Wi-Fi 7 | 2 | −96.0 |
| Max wireless speed | 2,976 | 7,876 | 2 | −62.0 |
| 6 GHz band | No | 52% of the class have it | 1 | −48.0 |
| WAN port speed | 1 | 2.5 | 1.5 | −45.0 |
| Multi-gig LAN | No | 69% of the class have it | 0.8 | −38.4 |
| Built-in security suite | No | 52% of the class have it | 0.5 | −24.0 |
| RAM | 512 | 1,024 | 0.7 | −17.5 |
| Frequency bands | 2 | 3 | 1 | −17.0 |
| Processor cores | 2 | 4 | 0.5 | −12.5 |
| LAN ports | 4 | 4 | 1 | +0.0 |
| USB ports | 1 | 1 | 0.3 | +0.0 |
| Antennas | 4 | 4 | 0.3 | +0.0 |
Not scored: Coverage area (unknown: not scored); MU-MIMO (unknown: not scored); OFDMA (standard for the class (100% have it)); Beamforming (standard for the class (100% have it)); Max connected devices (unknown: not scored); Link aggregation (unknown: not scored); Processor speed (unknown: not scored); WPA3 (standard for the class (100% have it)); Mesh support (standard for the class (94% have it)); Guest network (standard for the class (100% have it)); Parental controls (standard for the class (100% have it)); Quality of Service (QoS) (standard for the class (100% have it)); VPN server (standard for the class (100% have it)); App control (standard for the class (100% have it)); Weight (unknown: not scored); Wall-mountable (unknown: not scored).
Editor’s note
The Archer AX55 has been TP-Link's default budget Wi-Fi 6 router for years, and its US product page credits it with more memory than a budget router strictly needs. The datasheet for the current V4.6 hardware does not repeat that memory figure, so treat it as a claim TP-Link has not restated for the revision now on sale.
HomeShield's free tier covers router scans, device identification and basic URL filtering, but time limits, web protection, IoT protection and intrusion prevention sit behind a subscription after a 30-day trial, which is easy to miss when reading the feature list.
What you are buying is a well-provisioned dual-band router that will not be the reason your Wi-Fi feels slow on a plan of a gigabit or below. The newer standard's extras are luxuries at that speed, and TP-Link is still updating the V4.6 revision, with a security build published in July 2026.
Specifications
Quality bars show where each figure sits between the lowest and highest of the 26 wi-fi routers this VS Score is measured against.
Wireless
Ports & wired
Hardware
Features & security
Design
Networking assessment
What the specification table does not say on its own: what this device needs to connect, what speeds are realistic, what costs extra, and where it falls short. Every statement below is read from the verified sheet or written by an editor — nothing is estimated.
Test environment
Research-based assessment: this brief is derived from the manufacturer’s published specifications for the TP-Link Archer AX55 and the documents listed under Sources and verification. We have not run this unit on our own network, so nothing here is a measurement of ours.
Connection requirements
The WAN (internet) port is rated at 1 Gbps. An internet plan faster than that is capped at the router, and nothing on the network can download faster than this port regardless of the wireless figures.
There are 4 LAN ports, all Gigabit; a switch is needed for more wired devices.
Throughput expectations
The Wi-Fi 6 headline of 2,976 Mbps adds together the theoretical peak of every band. A single device connects to one band at a time, so no client ever sees the total, and real-world speeds run well below the link rate even in the same room.
There is no 6 GHz band, so the least congested spectrum available to new phones and laptops is not on offer here.
OFDMA and MU-MIMO help most when many devices are active at once; they do not make a single download faster.
Firmware and subscriptions
The US Archer AX55 download page now covers hardware version V4.6. Its latest firmware is 1.2.1 (Build 20260527), published July 21, 2026, and TP-Link warns that this upgrade cannot be rolled back to the previous version. The release notes describe security and stability fixes only. Updates can be pushed from the web page or the Tether app, and the router supports automatic upgrades.
Set-up and management run through the manufacturer’s app; check whether a local web interface is offered as well.
Parental controls are listed; on several brands the scheduling and filtering tiers sit behind the same subscription as the security suite.
VPN support is built in, which avoids a subscription to a third-party VPN router service for remote access.
Security support
WPA3 is supported, the current Wi-Fi encryption standard; devices that only speak WPA2 still connect in mixed mode.
A guest network is available for visitors and smart-home devices, keeping them off the network your computers use.
Security-update cadence is not something manufacturers publish as a specification; see Support and updates below.
Real-world household suitability
Mesh support means coverage can be extended later with a compatible satellite instead of replacing the router.
Known limitations
Not offered, according to the spec sheet: 6 GHz band, multi-gig LAN, built-in security suite.
7 specifications are not published by the manufacturer and are shown as Unknown rather than guessed.
Support and updates
The V4.6 user guide, datasheet and quick installation guide sit on the same support page alongside FAQs, an emulator of the web interface and TP-Link's community forum. HomeShield's free tier gives router and wireless scans, device identification and basic parental controls with URL filtering, while web protection, IoT protection, intrusion prevention and time limits are paid add-ons after a 30-day trial.
Sources and verification
Where the specifications come from
- Official product pagetp-link.com
- Datasheet or manualstatic.tp-link.com
- Support and firmware documentationtp-link.com
- Independent testingrtings.com
Verification
- First published
- Specifications last checked
- Sheet completeness
- 21 of 28 specifications verified; the rest show as Unknown and are never estimated or scored
- Page type
- Product specification page — Compiled from the manufacturer’s published specifications and the cited sources; this is not a hands-on test.
- Basis
- Research-based: specifications and editorial text were compiled from the documents listed here and the manufacturer’s published data. We have not tested this unit ourselves; where independent measurements are mentioned they belong to the linked publication.
Wi-Fi Routers with similar specs to the TP-Link Archer AX55
Ratings & reviews
No reviews yet. Be the first to share your experience.
The bottom line
The TP-Link Archer AX55 earns a VS Score of 19, below the median of the 26 wi-fi routers it is measured against (a score of 50 is level with that median).
- Who it’s for
- Households on a gigabit-or-slower connection that want a dual-band Wi-Fi 6 router with a VPN server and USB storage sharing, and own no client that would use Wi-Fi 7.
- Who should look elsewhere
- Anyone on a multi-gig broadband plan, since every port is gigabit and the router caps the connection, and anyone who wants a security suite with no subscription tier.
- The trade-off that matters
- TP-Link put the effort into antennas, wide channels and features instead of multi-gig Ethernet, which is the right call below a gigabit and the wrong one above it.
- The main alternative
- TP-Link Archer AX55 Pro: essentially the same router with two 2.5 Gbps ports, the obvious step up if your broadband already exceeds gigabit.
The VS Score is calculated from the weighted specifications above, each measured against the median of comparable wi-fi routers — a shortlisting guide, not a substitute for your own priorities. See how we score.